
Task: Create a lead in Microsoft Dynamics 365 Sales from a web form submission
Difficulty: Easy
Total time to implement: 1-2 hours
Content
- Creating the form (read post)
- Embedding the form on a webpage (read post)
- Connecting the form with Dynamics 365
- Creating a flow
- Configuring the flow
- Testing the flow
In this last part of my three-part blog series, I’ll show how you can leverage a Microsoft Power Automate flow to automate the task of creating a lead record from a form submission. While in previous posts we have already created a web form, published it and embedded on a webpage, in this post we will create a flow that will create a lead record in Dynamics 365 Sales and send a couple of emails.
Creating a flow
Microsoft Power Automate offers many connectors that provide variety of ways to integrate different applications. For the purpose of our flow we will use Microsoft Forms submission as a trigger and the CDS connector. The great thing about the CDS connector is that it also works with both custom Power Apps and 1st party Dynamics 365 Customer Engagement apps.
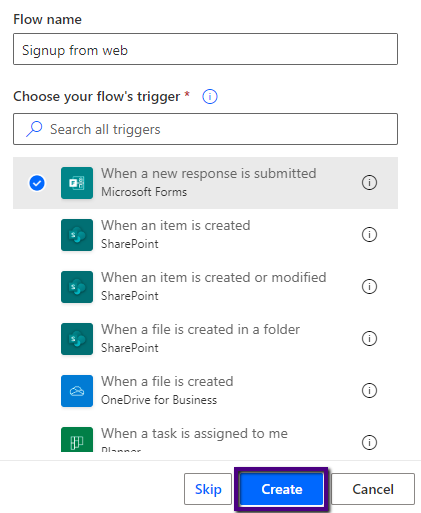
We create our flow by going to the flow.microsoft.com website and:
- Click + Create on the left navigation. This opens a page where we can choose from different options. We will create a flow from blank.
- Choose Automated flow. This opens up a window where we can choose a trigger.
- Give your flow a name and select Microsoft Form submission as a trigger.
Configuring the flow
One of the things I like the most about Power Automate is its flow builder. For those who are like me and are used to Dynamics workflows, it takes some time to get used to the new maker experience. From the perspective of users that have no experience with workflows or flows, it is not so different from filling out a form. No worries, I will guide you through this. So, to begin configuring our workflow we first need to define which form applies and then a couple of actions which the submitted form (the trigger) will perform.
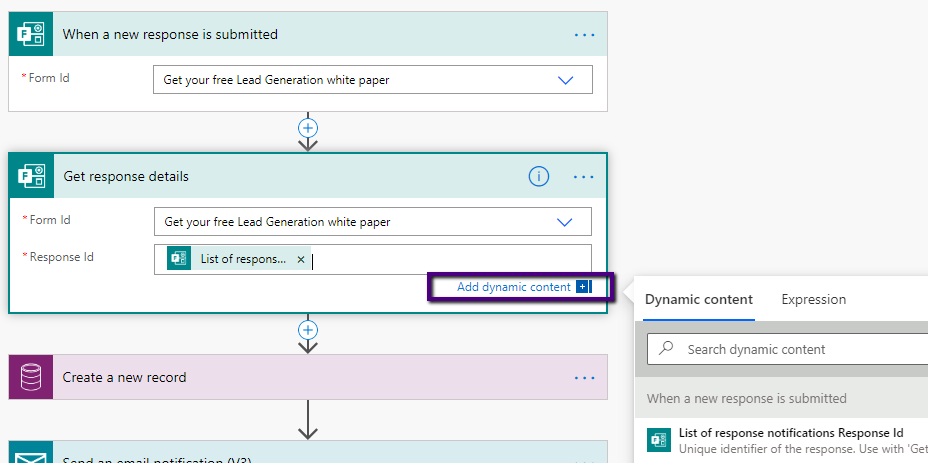
A) Get response details
- In the first block choose the form from the drop down list. In my case it is called ‘Get your free Lead Generation white paper’.
- Click on +New step button under the block to define the first action which the submitted response trigger will perform. You will see a variety of option in the list.
- In the search type in ‘Get response details’ and select the appropriate option from the list.
- In the Form Id field choose your form again and in the Response Id select the ‘List of response notifications’ from the Dynamic content on the right side.
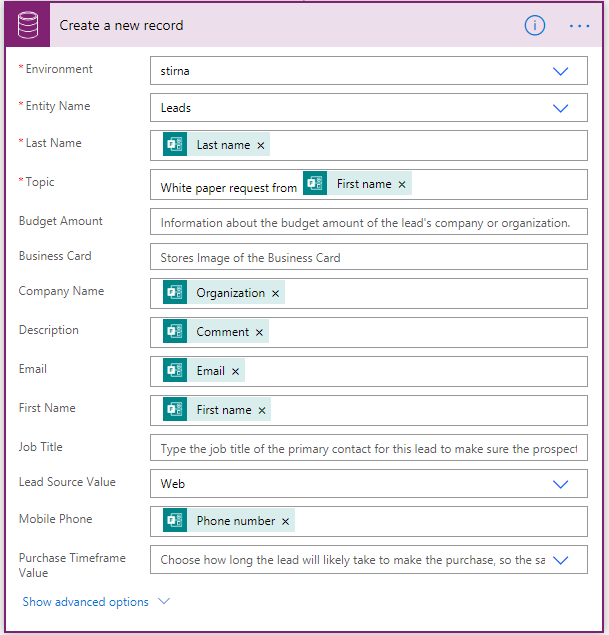
B) Create a new record
- Click on +New step button under the block to define the next action.
- Choose the ‘Create a new record’ from the list of actions or type its name into the search. (It’s a premium CDS connector. If you don’t have a license you can opt into a free trial.)
- In the new block that appears select the Dynamics 365 environment in which you want the record to be created. Note that the environment labeled ‘default’ generally does not have any app specific entities such as leads.
- In the Entity Name field type in ‘leads’ and select the Leads entity from the list. This will expand the block to include editable fields on the lead record.
- Fill in the fields using the Dynamic content options where applicable and give the lead a good name. I recommend you define the lead source value as well.
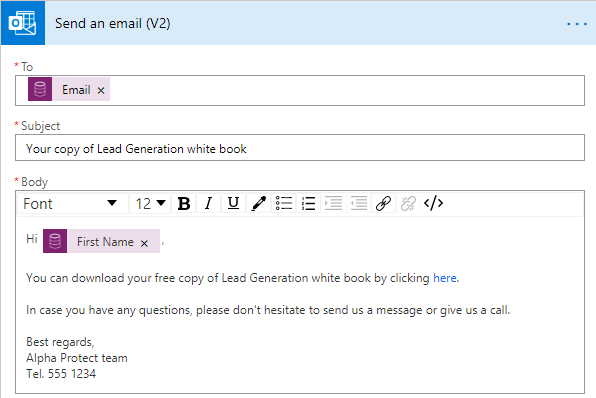
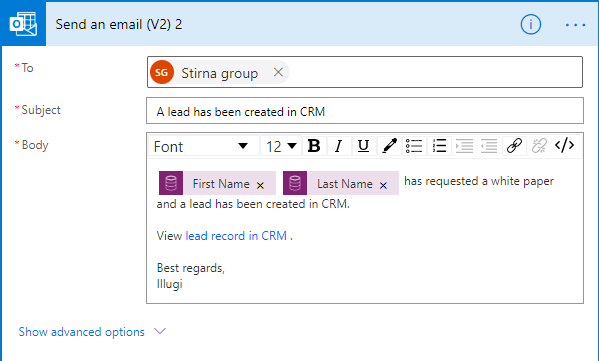
C) Send an auto response
- Click on +New step button under the previously created block to define the third action.
- In the Search type in ‘Send an email’ and select the Send an email (V2) from Outlook.
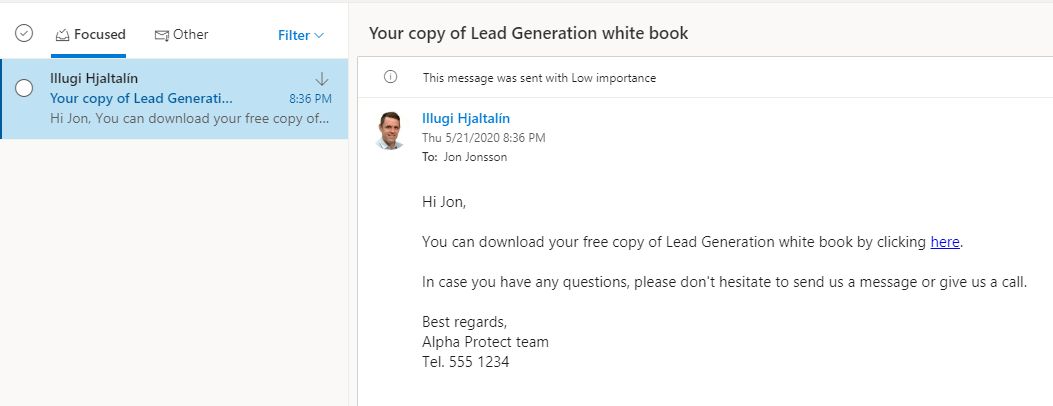
- In the To field use the Dynamic content and select the Email either from the lead record created in B). This will automatically populate the email that the prospect provided when submitting the form.
- Type in a subject. You can personalize the subject line with Dynamic content. In this case I am just using plain text.
- Fill in your message in the Body field. You can use some basic formatting here, include hyperlinks and dynamic content. In this example I have used the first name of the lead and inserted a hyperlink to a PDF document on OneDrive.
D) Send an email notification (advanced)
This part is a bit more advanced. So, if you are not comfortable with HTML you may want to skip this part and go to the next section.
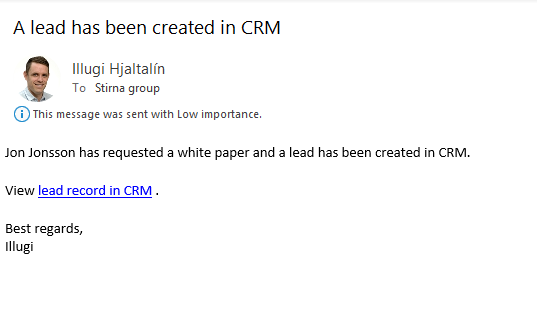
A common requirement from marketing or sales teams is to receive an email notification when a lead is created. This can be achieved with the same action as in C). You can follow the same steps but type in a group email address belonging to your team(s) in the To field (e.g. info@example.com). What we want to do differently in this case is to leverage the id of the lead record to create a link to that record in Dynamics 365 Sales. To do this you:
- Open up any lead record in your CRM and copy the URL from the browser. You are going to need this in the next step.
- Copy the whole URL and paste it inside the body of the email.
- Delete the part that comes after ‘lead&id=’ in the URL. This is the unique ID of the lead.
- Replace the part you removed in point 3 with the lead id from the lead created in section B) . You’ll find this value in the Dynamic content.
- Copy the whole line from points 3-4 to your clipboard.
- Create a hyperlink using the create hyperlink icon.
- Paste the URL into the URL.
- You can remove what you typed initially typed in steps 3-4.
- Save your flow.
Testing the flow
Microsoft Power Automate comes with a sophisticated testing mechanism. We want to test if our flow runs successfully before we deploy it. To do this we:
- Click the Test button on the top right side of our flow builder.
- From the two options that appear, select ‘I’ll perform the trigger action’.
- Click ‘Save & Test’. This means we have to perform the trigger action, i.e. submit a response through our form.
- Go to the landing page with your webform and submit a response.
- Go back to Power Automate flow builder to see the results. In this example the flow ran successfully.
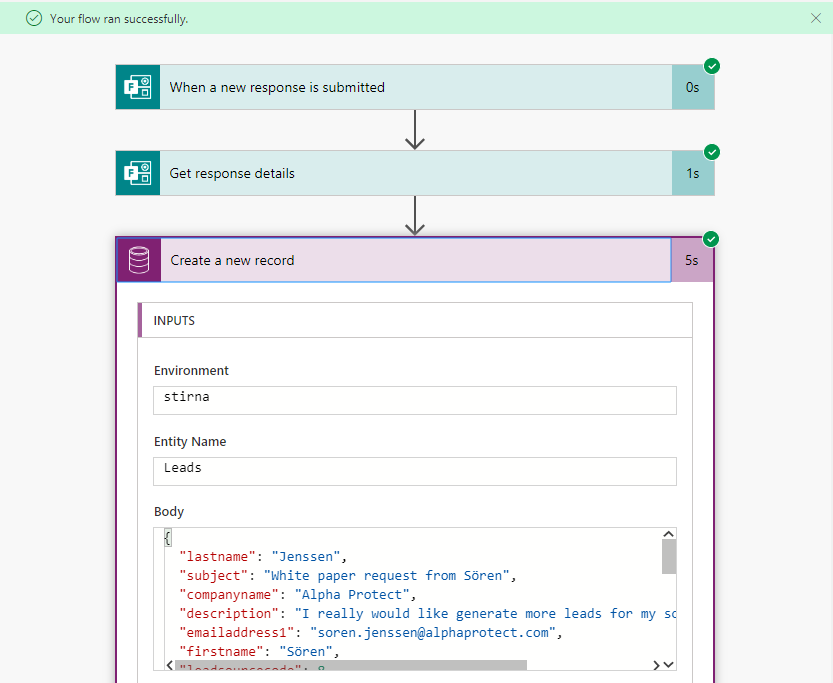
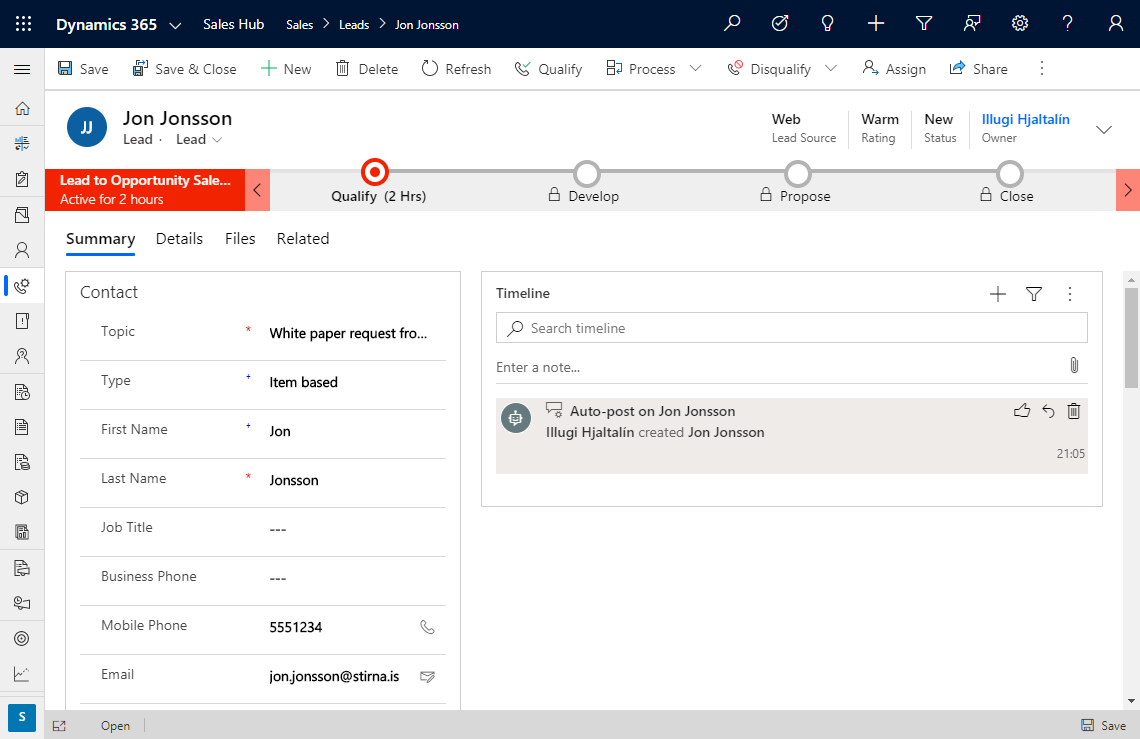
Below are screens from the email notifications that were sent out as well as the lead that was created in Dynamics 365 Sales.
You can also watch how this is done by checking out the video below:
Leave a Reply