Tasks: Send a notification when a contact opens a Dynamics 365 attachment
Difficulty: Intermediate
Time to implement: 1-2 hours
In this post I’ll show you how you can use the Email Engagement solution, which I showed you how to configure in my previous post, to automatically sending a notification when a contact/recipient has opened a Dynamics 365 email attachment.
Tools
- Dynamics 365 Sales: A popular CRM system from Microsoft that allows you to track your sales pipeline and activities, opportunities, and leads.
- Email Engagement: One of Sales Insights’ solutions that enables you to follow emails in Dynamics 365 Sales. See my post Tracking opens and clicks of Dynamics 365 emails to see how it is enabled.
- Power Automate: A service from Microsoft that allows you to connect different systems and create automated processes. In this example it is used to create a task and send a notification to the owner of a Dynamics 365 email message when an attachment is opened. In this post premium connectors are used that require a premium license for Power Automate.
Email Engagement follow up options
Email Engagement allows you to follow emails you send from Dynamics 365. It also gives you an option to set reminders to follow up on emails. The available options are:
- If I do not receive a reply by
- If the email is not opened by
- Remind me anyway at
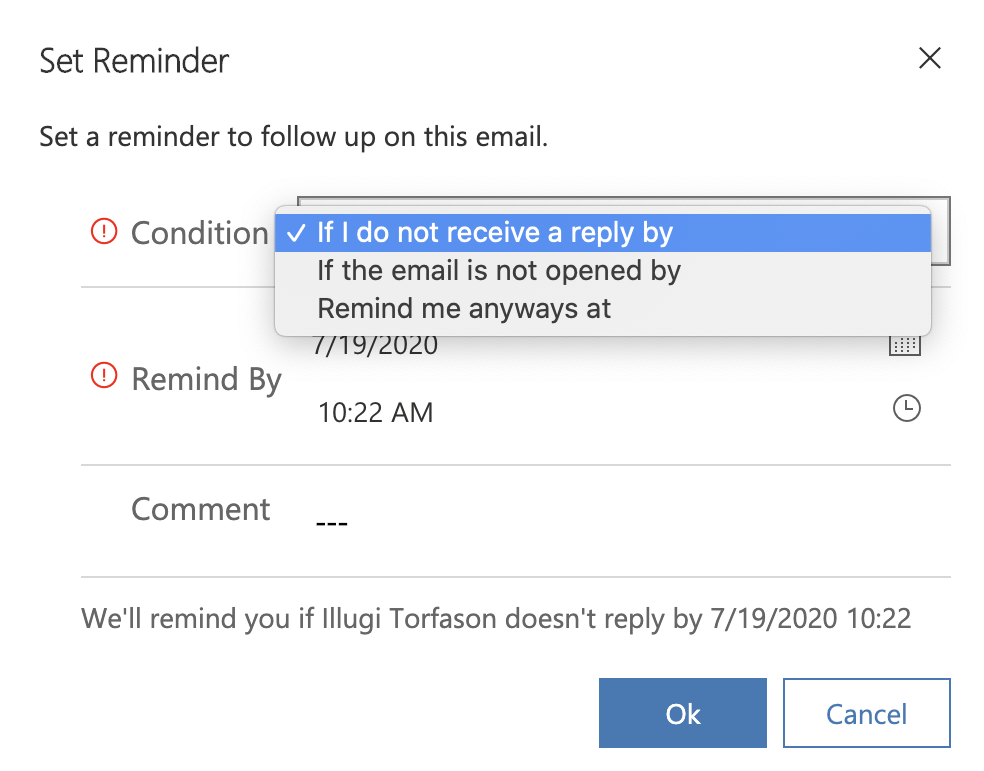
The reasoning behind these options is that a salesperson wants to be able to follow up if there is no recipient activity. Another use case is when there is a recipient activity, the salesperson might want to follow up. E.g. when an email attachment containing a quote or a pricing is opened. The purpose of this exercise is to expand the current options to enable notification when a contact/recipient opens an attachment that is tracked via Email Engagement. To this end we will leverage Power Automate to send the notification.
A prerequisite to perform the work in this exercise is that you have already enabled Email Engagement in your Sales Insights settings, OneDrive integration in Dynamics 365, and that you have the appropriate licenses and permissions, of course.
Create and configure a flow
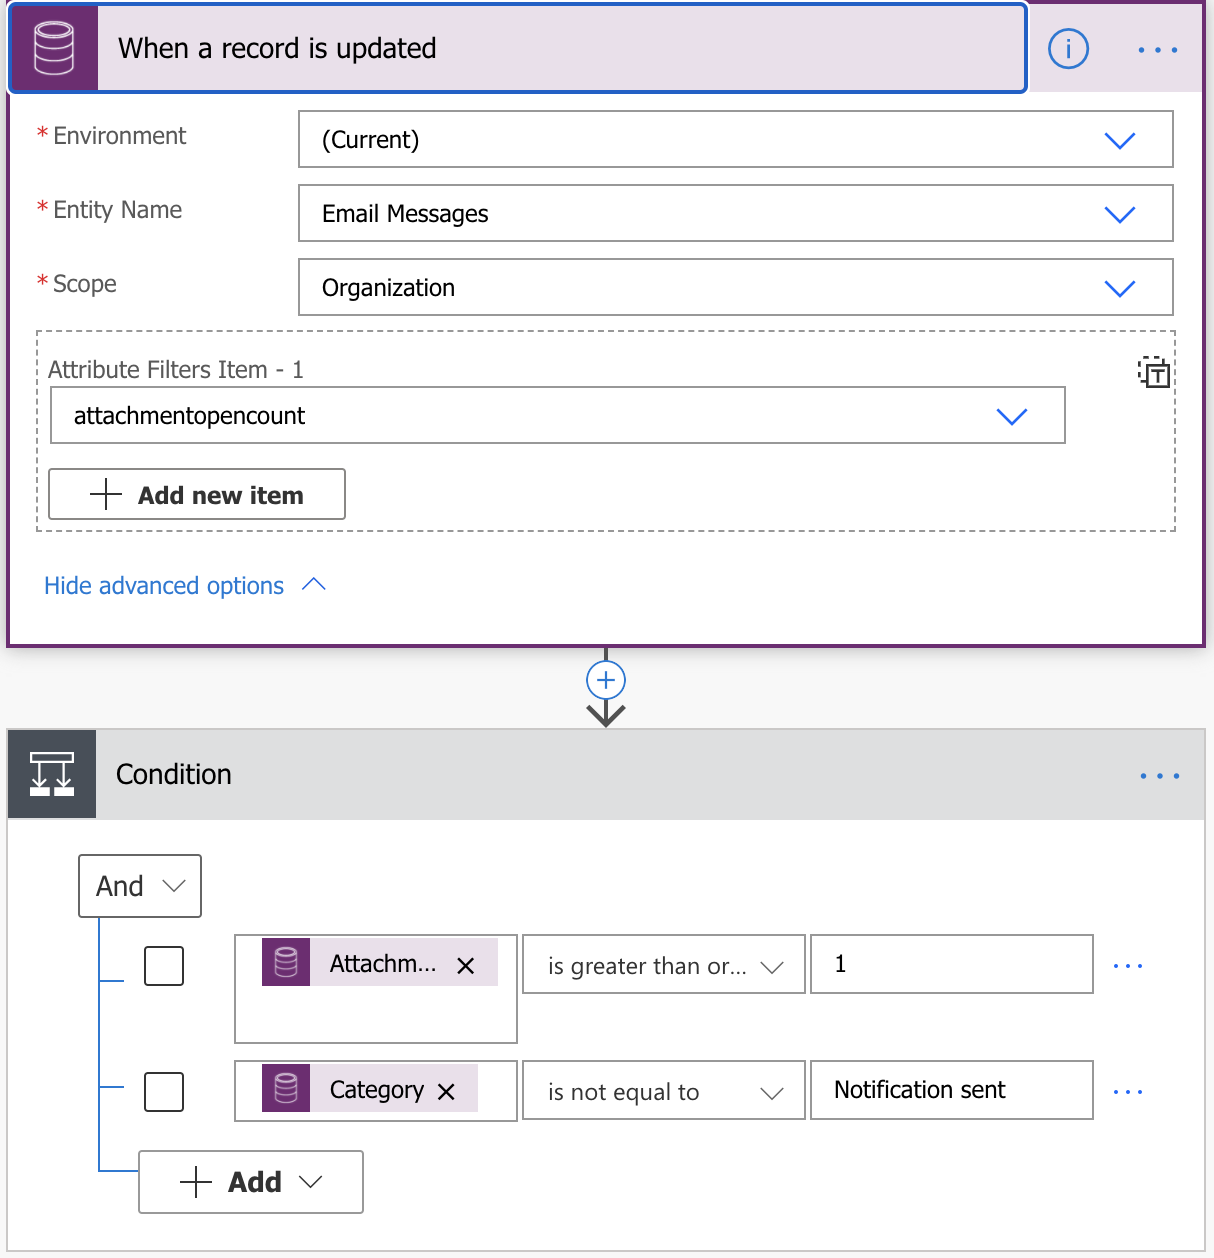
You start by navigating to flow.microsoft.com, create a flow from blank and choose the ‘When a record is updated’ trigger. This will open up the flow designer. To configure the flow you:
- Choose current environment in Environment.
- Choose Email messages in Entity name.
- Choose Organization in Scope.
- Under advanced options choose attachmentopencount. This lets the Flow know which fields on the email record you would like to monitor. In this case you want to monitor changes to the Attachment open count.
Next you insert a condition that checks if the number of opens your attachment has received is more than zero and that a category does not contain a specific value (we will come back to this later).
- Click on the ‘New step’ button.
- Select Condition.
- In the first condition insert Attachment open count equal to or greater than 1.
- In the second condition insert Category does not contain ‘Notification sent’.
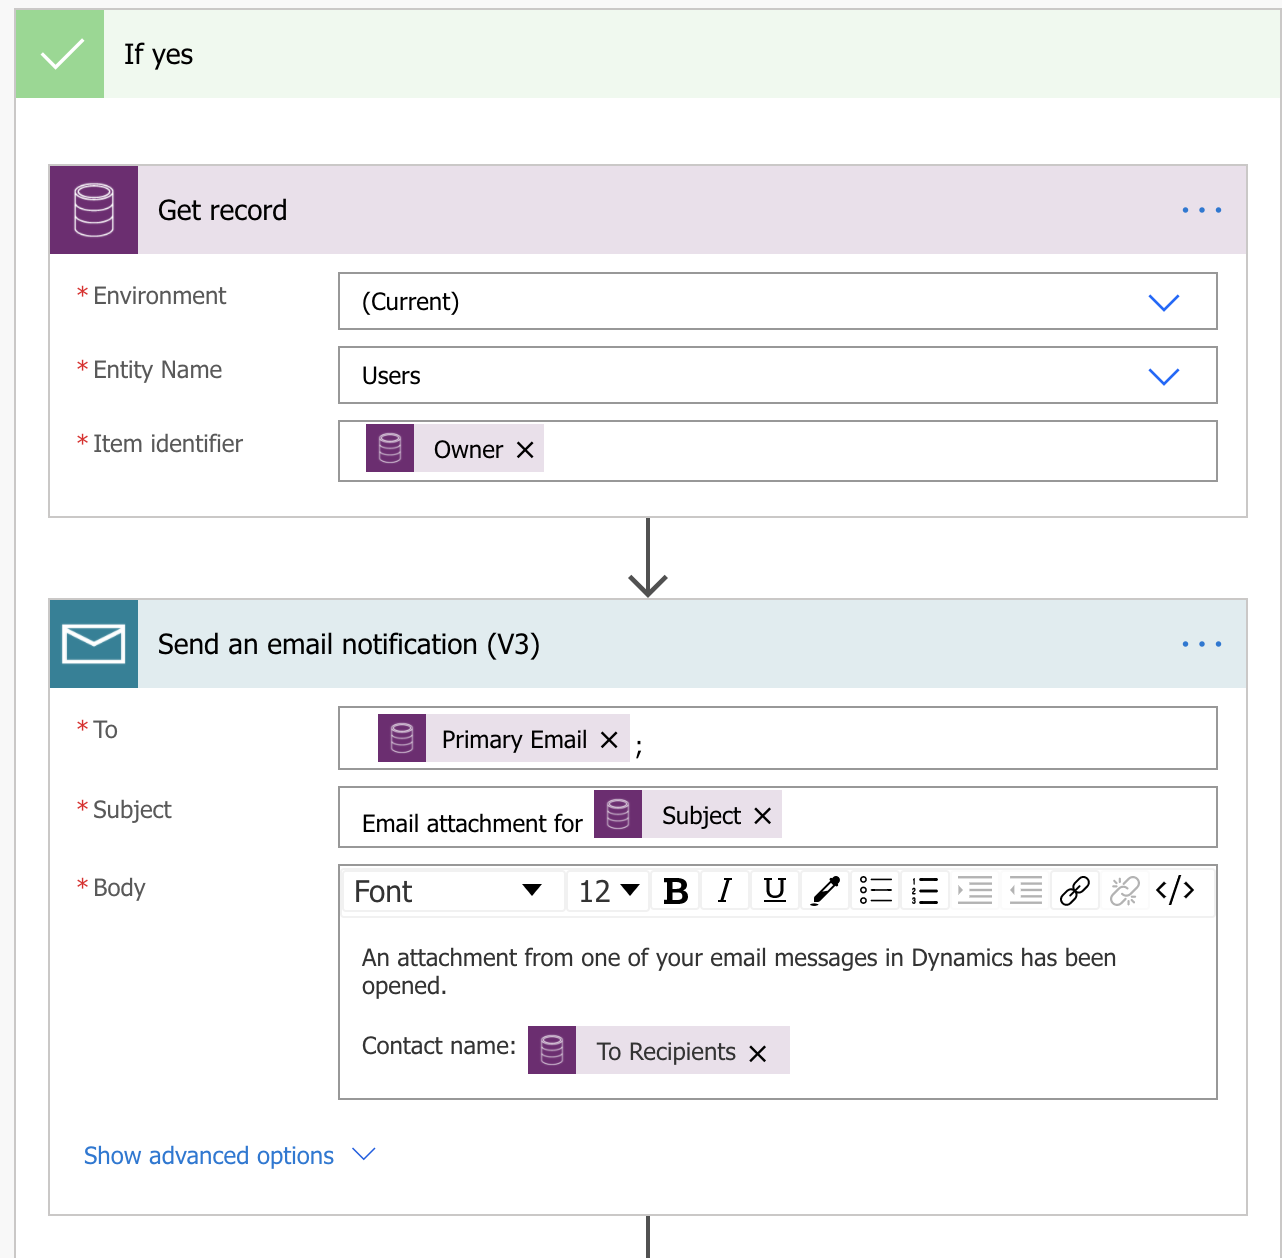
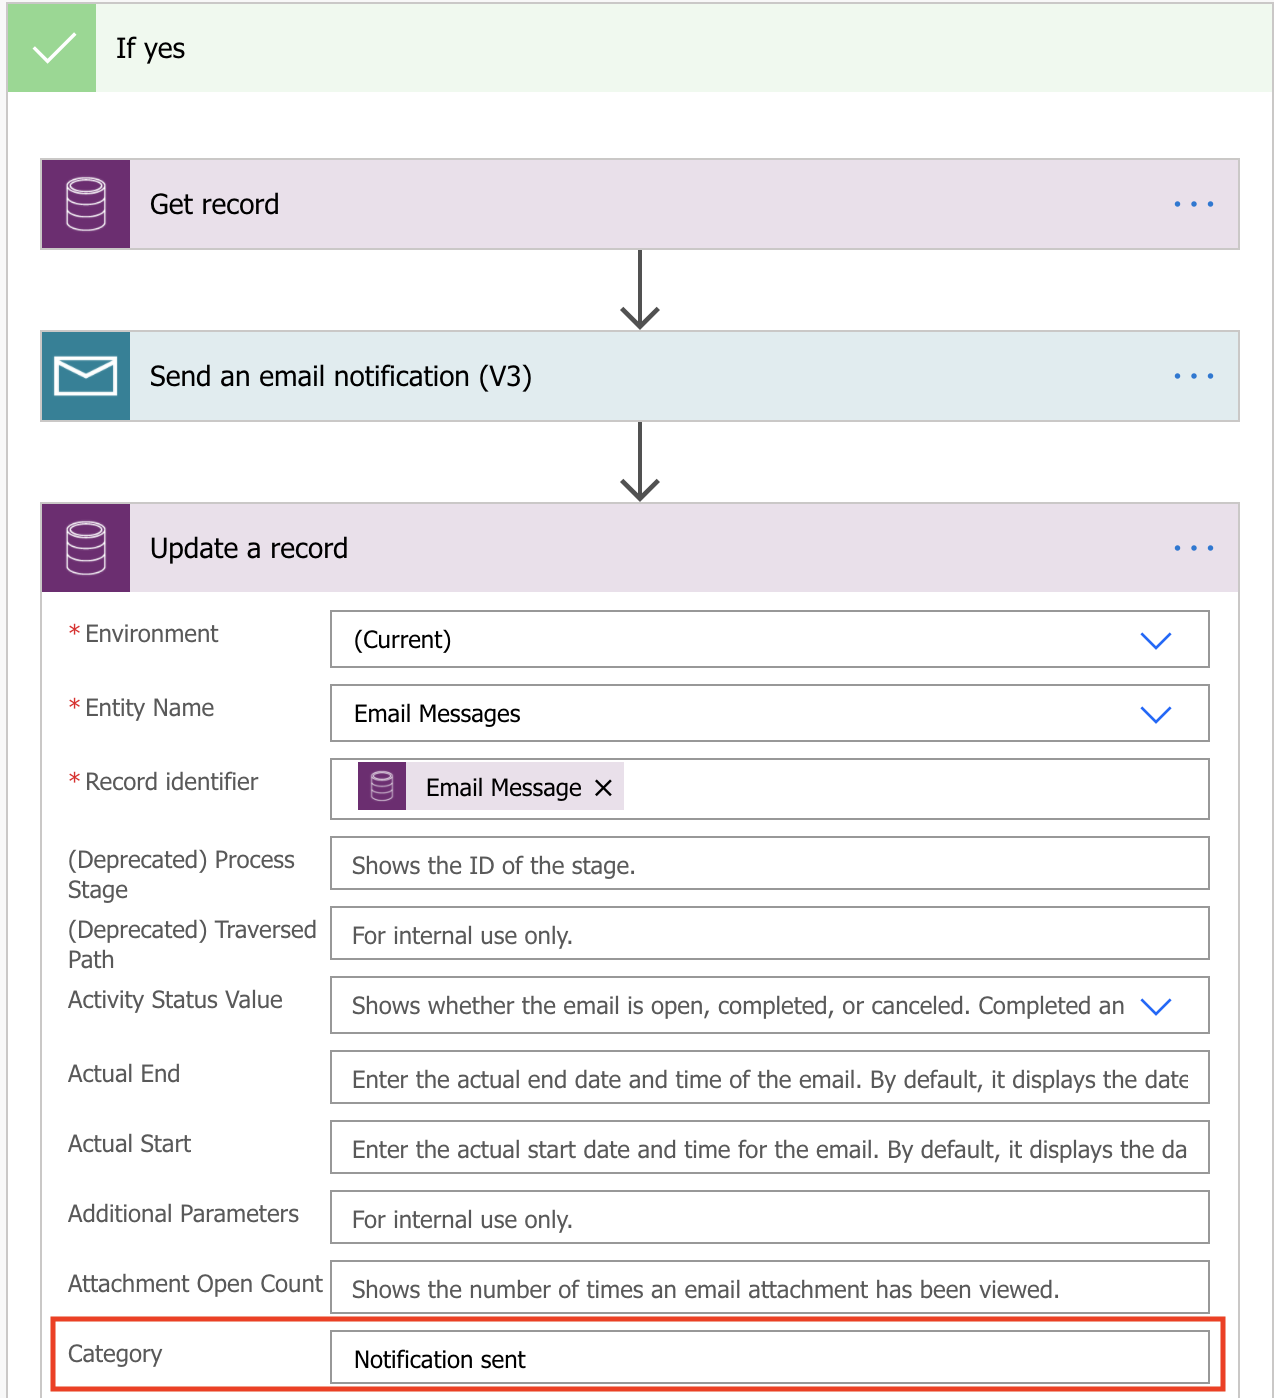
When the condition is true you want the email notification to be sent. First you need to get the user information and then you will send the notification. Lastly you want to update the email message to ensure that the user doesn’t receive more than one notification.
- In the ‘If yes’ box click ‘Add an action’.
- Choose Get record (CDS).
- Choose current environment in Environment.
- Choose Users in Entity name.
- Put in the Owner of the email message as the Item identifier.
- Below the Get record action, click ‘Add an action’.
- Choose Send an email notification (V3). You might have to authenticate or accept to continue.
- In the To field insert the Primary Email from the user record.
- Fill in the subject and body of the email. You can use Dynamic content here which is recommended so the user knows which email/contact you are referring to.
- Below the Send an email notification (V3) action, click ‘Add an action’.
- Choose Update a record (CDS).
- Choose current environment in Environment.
- Choose Email Messages in Entity name.
- In the record identifier put in the Email Message ID.
- Click ’Show advanced options’ and type in ‘Notification sent’. This is necessary to indicate somewhere on the record that a notification has been sent to the user. You can use any field. In this case I am using an OOB field called Category. If you are using Category for something else you may consider creating a custom field to store this value.
- Click Save to save your flow.
Testing the flow
You can now test your flow to see if everything works as it should. Do a couple of test runs on the same email message to verify that only one notification email is sent when an attachment is opened multiple times (note that the email must be sent through Dynamics 365 with a followed attachment). For more information about performing the tests, please refer to the blog post’s video above.
Leave a Reply